As an Amazon Associate I earn from qualifying purchases. This page may contain affiliate links.
ATV studs for tires are small metal inserts pressed into the tread blocks of an all-terrain or mud tire to add bite on ice, packed snow, and hard-packed trails. This guide explains what studs do, how to pick the right type and count for your machine, how to install them without damaging the tire, and how to keep them working through a season of riding. By the end, you will know how to decide whether studs make sense for your trails and how to set them up so they hold.
What ATV Studs Do and When They Make Sense
A stud is a hardened pin, usually carbide or steel, that sticks slightly above the tread surface. On ice or frozen ground, rubber alone has little grip, and the stud penetrates the surface to hook into it. On loose mud, dirt, or deep snow, studs add little because the tread itself already does the work. Knowing this difference keeps you from spending money and time on studs for conditions they cannot help.
Shopping for one? See our guide: Side by Side Atv Utv (2026): Which Should You Choose?.
Studs tend to earn their place in these situations:
- Frozen lakes, ice-covered trails, or glazed hills where tires spin or slide sideways
- Packed snow trails with steep climbs and hard-pack that turns slick under a machine’s weight
- Hunting or utility use in winter, where you need predictable traction on uneven frozen ground
Studs are a poor choice if your riding is mostly mud, sand, or dry dirt. They also add noise and can wear faster on pavement or gravel. If you ride paved roads between trails, many owners prefer to swap studded tires for their normal set when the weather warms.
Choosing the Right Stud Type and Count
Stud products vary in material, head shape, length, and how they seat. Matching them to your tire tread and your riding conditions matters more than chasing the highest count.
Material and Head Style
Carbide studs hold their point longer on abrasive ice and are the common choice for serious winter use. Steel studs are less expensive and fine for lighter, occasional use but dull faster. Flat-head or wide-head studs spread load and resist pulling out, while narrow-pin designs bite harder but can loosen if the hole is oversized.
Stud Length and Protrusion
Most stud kits specify a protrusion height, often in the range of a few millimeters above the tread face. Longer studs grip better on ice but increase vibration, reduce ride comfort, and can catch on rocks or roots. Manufacturers usually recommend a length that suits your tire’s tread depth; stay within their guidance.
How Many Studs Per Tire
Stud count depends on tire size and tread pattern. Owners commonly run studs in the outer tread blocks and across the center rows, leaving some blocks unstudded to keep the tire from feeling too rigid. Check the specific kit or tire maker’s guidance rather than filling every block, because overloading a tire with studs can weaken the tread and make it hop on pavement.
Tools and Supplies You Need
Installation is simple, but the right tools make the job cleaner and help the studs seat properly.
- Stud insertion tool or the installer supplied with your kit
- Tire pressure gauge and a way to deflate the tire to a safe installation pressure
- Soap and water or tire lubricant to ease stud insertion
- Marker for mapping stud positions on the tread
- Stud pattern chart from the manufacturer, if provided
- Clean rag and a soft brush to clear dirt from the tread
For tire inflation and deflation, a reliable gauge is essential. Reading about Tire Pressure Gear: Gauges, Deflators, Compressors can help you choose equipment that keeps pressures consistent during install and after.
Step-by-Step: Installing Studs on ATV Tires
Work on the tires with the machine supported so each wheel can turn freely. Take your time; a rushed install is the most common reason studs loosen or leak.
- Clean the tread. Remove mud, grit, and stones. Dirt in the holes will prevent a clean seat.
- Set the pressure. Lower the tire to the pressure specified by the stud maker, usually a low pressure that lets the rubber flex around the insert. Do not go below the minimum for the tire’s load rating.
- Map the pattern. Mark where each stud will go. Keep the pattern even across the tire so the tread wears uniformly.
- Lubricate the hole. Apply a small amount of soapy water or a tire-safe lubricant to the stud base. This reduces tearing as the stud enters.
- Insert each stud. Use the installer to press the stud straight into the rubber until the head sits at the correct depth. Do not twist or angle it.
- Check seating. Each stud should feel firmly anchored. Tug gently; a loose stud needs to be removed and reinserted into a new position, not forced.
- Reinflate to spec. Bring the tire back to your normal operating pressure and check for leaks around the studs with soapy water.
- Test ride slowly. Make a short, low-speed run on a safe surface and listen for odd noises or vibration before heading out.
Checking Stud Tightness and Tread Wear
After the first 10 to 20 miles, recheck every stud. Settling is normal, but a stud that has backed out needs attention before it damages the tire or falls out on a trail. Inspect the tread monthly during the season, and watch for uneven wear around the studs, which often signals a seating or pressure problem.
Common Mistakes to Avoid
- Installing at the wrong pressure. Studs seated at high pressure can pull out under load. Follow the installation pressure in the kit instructions.
- Forcing studs into dirty or dry holes. This tears rubber and creates weak anchor points.
- Overstudding. Too many studs stiffen the tread and reduce flex, which can make the ride harsh and wear the rubber unevenly.
- Ignoring tire load ratings. Studs do not change how much weight a tire can carry. Keep within the rating for your machine and load. A broader overview is in Off-Road Tires Explained: Types, Sizes and Load Ratings.
- Riding studded tires on pavement for long distances. Studs can grind down, cause vibration, and damage the road surface. Remove them or swap wheels for road use.
- Skipping post-install checks. Loose studs found on a trail are far harder to deal with than ones caught in the driveway.
Tips for Better Traction and Longer Stud Life
- Choose studs for the specific tire model. A stud kit made for one tread may not fit another.
- Reduce speed on ice. Studs help, but they do not shorten braking distance the way you might expect.
- Keep tire pressure consistent. Low pressure improves contact on ice; overly low pressure risks rim damage.
- Store the machine out of direct sun during off-season to reduce rubber aging around studs.
- Remove studs before summer or swap to an all-terrain set if your trails change seasonally. For tread trade-offs in general, see All-Terrain Tires: Tread, Road Trade-Offs and Snow.
Recommended gear
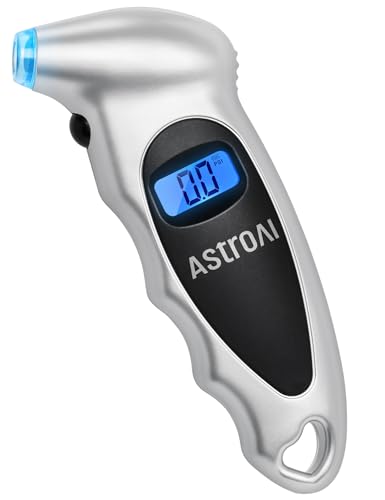
A quality tire gauge is the foundation of a good install, since pressure drives how studs seat. Compare options with View on Amazon.
A tire deflator lets you drop pressure quickly and evenly on the trail or at home, which helps when you need to re-seat studs. Browse options with View on Amazon.
A portable air compressor brings pressure back up after install or trail changes. Compare models with View on Amazon.
Carbide stud kits designed for ATV tires give better bite on ice than basic steel versions. Search View on Amazon and check that the kit matches your tire size and tread.
FAQ
Are studs for ATV tires legal?
Stud rules vary by state, province, and land manager. Some public trails and seasonal areas restrict studs, so check local regulations and trail signage before riding.
Can I stud any ATV tire?
Most tires can be studded, but the tread must be deep enough to hold the insert. Confirm compatibility with the stud manufacturer and the tire maker before installing.
How many studs should I put in each tire?
Follow the stud kit’s pattern guidance. Many riders leave some tread blocks bare to preserve flexibility and ride quality.
Do studs wear out the trail or pavement?
They can. Studs grind on pavement and can mark or damage soft trail surfaces, so limit studded use to ice, snow, and terrain that suits them.
Will studs affect my ride quality?
Yes. Studs add some vibration and can reduce comfort on hard surfaces, especially with longer protrusions. Shorter studs usually ride more smoothly.
Should I stud my tires before the first snow?
It is best to install them before you need them, once conditions are cold enough to make the work comfortable, and to test them on a safe surface first.
Do I need to rebalance my wheels after studding?
Uneven stud placement can create imbalance. If you feel vibration after install, recheck the pattern and consider having the wheel balanced by a shop familiar with ATV tires. A professional should confirm any structural concerns with the tire or rim.
Conclusion
ATV studs for tires add real traction on ice, packed snow, and frozen trails when matched to the right tread and conditions. Choose the material, length, and count the manufacturer recommends, install them at the specified pressure, and recheck them after the first few rides. Keep studded tires for winter terrain, and swap back to your regular set when the trails clear.