 By Lauren Holland
Updated November 2026
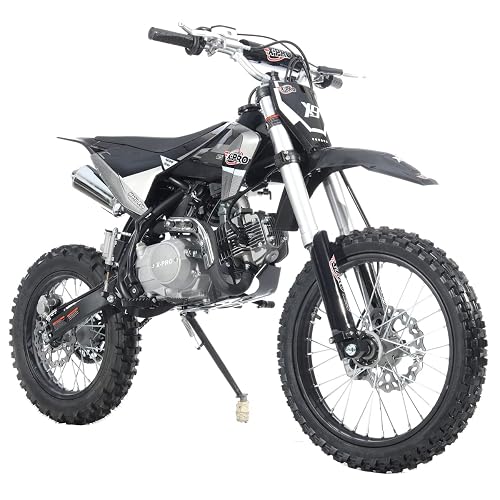
The Surron Light Bee X electric dirt bike is a lightweight, battery-powered off-road motorcycle built for trail riding, pump-track sessions and youth or adult riders who want a quiet, low-maintenance machine. By the end of this guide you will understand what the Light Bee X is designed to do, how to check its readiness before riding, how to set up its ride modes and suspension, how to keep the battery healthy, and where it fits compared with gas-powered dirt bikes.
What the Surron Light Bee X Is Designed to Do
The Light Bee X is an electric motocross-style machine from Surron, a brand known for compact electric off-road bikes. Its appeal comes from a low curb weight, instant throttle response and very little routine maintenance compared with a two-stroke or four-stroke engine. Riders typically use it on single-track, open fields, dirt roads and skill areas where noise restrictions or access rules make gas bikes less practical.
Before you ride, confirm the exact model year and motor configuration on the spec label, since Surron has offered several variants of the Light Bee line with different power outputs and battery options. The manufacturer’s published specifications are the reference point for top speed, range, charge time and rider weight limits. Treat any range figure as a best-case estimate, because real-world distance depends heavily on terrain, rider weight, throttle habits and temperature.
Step 1: Confirm Rider Fit and Size
Fit matters more on a light, responsive bike than on a heavier machine, because small changes in body position shift the bike quickly. Check these points before the first ride:
- Seat height: with both boots flat on the ground, your knees should have a slight bend. Riders who cannot touch the ground safely should not ride until the bike suits their inseam.
- Handlebar reach: you should be able to reach the controls with elbows slightly bent and your weight centered over the footpegs.
- Rider weight: confirm the manufacturer’s stated rider weight limit for your variant and stay within it.
- Age and experience: youth riders should be supervised and, where the bike is sold for a younger age group, use the appropriate power setting.
If you are buying for a teen, many riders find it helpful to start in the lowest power mode and move up only after they can stop, turn and brake smoothly from a walking pace.
Step 2: Pre-Ride Inspection Checklist
Electric bikes have fewer moving parts than gas bikes, but the parts they do have still need regular attention. Run through this list before every session:
- Battery: confirm it is fully seated and locked, with no visible damage, swelling or loose connectors.
- Brakes: check lever feel, pad thickness and rotor condition. Squeeze the lever and confirm firm engagement.
- Tires: look for cuts, pressure loss and adequate tread. Set pressure within the range printed on the sidewall or in the owner’s manual.
- Chain and sprockets: check tension and lubrication. Most owners adjust chain slack using the rear axle adjusters, following the manual’s specified measurement.
- Fasteners: check axle nuts, handlebar clamps, footpeg bolts and the seat mounting for tightness.
- Throttle and controls: confirm smooth return, no sticking and correct action of the kill or power switch.
- Lights and display: if your model includes a display, confirm it powers on and shows battery level and mode.
Step 3: Choose the Right Ride Mode
Most Light Bee X setups offer selectable power or ride modes that limit top speed and throttle aggression. Using the right mode for your skill level is one of the simplest ways to ride safely and extend battery range.
| Mode Type | Best For | Riding Benefit |
|---|---|---|
| Low / Beginner | New riders, youth riders, tight trails | Gentle throttle response, easier control |
| Medium / Trail | General trail riding, mixed terrain | Balanced power and range |
| High / Full Power | Experienced adults on open terrain | Maximum acceleration and top speed |
Exact mode names, speed caps and any adjustment method vary by model year and firmware. Check the owner’s manual or the manufacturer’s current documentation before changing modes, and avoid high power until braking and throttle control feel automatic.
Step 4: Set Up Suspension and Body Position
Suspension settings affect handling more than most new riders expect. Manufacturers usually specify a sag measurement, which is how far the suspension compresses under rider weight. Measure sag with a helper, mark the fork tube and shock, and adjust preload until the measurement matches the manual’s target. Make small changes, one at a time, and ride the bike between adjustments.
Standing Position
Stand with your knees and hips flexed, elbows up and weight centered. Keep your head up and look ahead through the turn rather than at the front wheel.
Braking Technique
Use both brakes, with more pressure on the front in firm dirt and more on the rear in loose surfaces. Brake before corners, not during them, and keep your weight back when descending.
Step 5: Battery Care and Charging Habits
The battery is the most important component to care for. Lithium-based packs last longer when you avoid extremes of heat, deep discharge and prolonged storage at full charge.
- Charge after rides rather than leaving the pack empty for days.
- Store the battery at a moderate charge level, following the manufacturer’s storage guidance, in a cool, dry place away from direct sun.
- Let a warm battery cool before charging, and charge only with the supplied or manufacturer-approved charger.
- Never charge a damaged, swollen or overheated battery. Stop using it and contact a qualified service center.
- Keep the charging area clear of flammable materials and do not charge unattended for long periods.
For electrical concerns or battery damage, consult a qualified electric vehicle service technician.
Step 6: Routine Maintenance Schedule
Electric bikes avoid oil changes, spark plugs and air filter cleaning, but they still need regular service. A simple schedule keeps the bike reliable:
- Every ride: visual inspection, tire pressure check, quick fastener check.
- Every few rides: chain cleaning and lubrication, brake pad check, wipe down the battery connection area.
- Monthly or after muddy rides: wash gently with low pressure, dry thoroughly, inspect bearings and linkage for play.
- Per the manual: suspension service, brake fluid replacement where applicable, and controller or firmware checks.
Common Mistakes
- Riding in high power before mastering braking and throttle control.
- Ignoring a loose chain or worn sprocket, which can cause drivetrain damage.
- Using a pressure washer directly on bearings, seals or the battery area.
- Storing the battery fully charged or fully drained for long periods.
- Skipping protective gear because the bike is quiet and feels slow at low speed.
- Assuming range numbers from marketing material apply to hard trail riding.
Tips for Better Trail Riding
Ride with a friend or club group when you can. Carry a small repair kit with tire levers, a spare tube or plug kit where appropriate, a multitool and a charged backup battery plan if you ride long distances. Plan routes around your real range, and turn back with a comfortable margin rather than pushing to empty. The Light Bee X rewards smooth, consistent riding, so focus on corner entry, body position and line choice before chasing speed.
For more context on choosing among electric off-road machines, see Rzr Electric Dirt Bike (2026): Which Should You Choose? and Dirt Bike Razor Electric: What It Is and Whether It's Right for You. If you are comparing youth-oriented options, 9 Best Childrens Electric Dirt Bikes (2026): Expert Picks covers a wider field. Riders weighing adult models may also find 6 Best Electric Dirt Bikes for Adults Compared (2026) useful.
Recommended gear
- Off-road helmet: A full-face helmet with a DOT or ECE rating is the baseline for trail riding, since it protects the chin and face in a fall. View on Amazon
- Riding goggles: Goggles keep dust, mud and debris out of your eyes and give clear vision in wind. View on Amazon
- Chest protector and knee guards: Protective armor reduces impact injuries on rocky or root-filled trails. View on Amazon
- Chain lube for dirt bikes: A dedicated chain lubricant helps reduce wear and keeps the drivetrain running smoothly in dust and mud. View on Amazon
FAQ
Is the Surron Light Bee X suitable for beginners?
It can be, especially in a low power mode with supervision. Beginners should master braking, body position and slow-speed control before using higher power settings.
How far can the Light Bee X go on one charge?
Range varies with terrain, rider weight, throttle use and temperature. Use the manufacturer’s stated figure as a starting estimate and expect less on hard off-road riding.
How long does it take to charge?
Charge time depends on the battery size and charger supplied with your model. Check the official specifications for your variant.
Does the Light Bee X need regular oil changes?
No. Because it is electric, it does not use engine oil. It still requires chain care, brake checks, tire maintenance and fastener inspections.
Can the battery be left charging overnight?
Only use the charger the manufacturer approves and follow its guidance. Avoid charging unattended for long periods and never charge a damaged battery.
Is the Light Bee X street legal?
Street legality depends on local and national rules and on the specific model configuration. It is primarily sold for off-road use, so check your local regulations and registration requirements before riding on public roads.
Should I wear protective gear on an electric dirt bike?
Yes. Electric bikes can still reach speeds where crash injuries are serious. A helmet, goggles, gloves, boots and body armor are strongly recommended on every ride.
Conclusion
The Surron Light Bee X rewards riders who take a methodical approach: check fit, inspect the bike before every session, choose a power mode that matches your skill and maintain the battery carefully. Good habits with tires, chain, brakes and suspension will keep the bike reliable and enjoyable. Start conservatively, build your skills in low power and wear proper protective gear on every ride.
Related reading
- 6 Best Electric Dirt Bike Motorcycle Picks for Teens and Adults (2026)
- 5 Best Childs Electric Dirt Bikes (2026): Expert Picks
Ready to choose one?
About Lauren Holland
Lauren Holland is part of our editorial team and reviews and edits our ATV, UTV/side-by-side & dirt bikes guides, checking product details against manufacturer specifications and owner feedback.