 By Graham Fisher
Updated November 2026
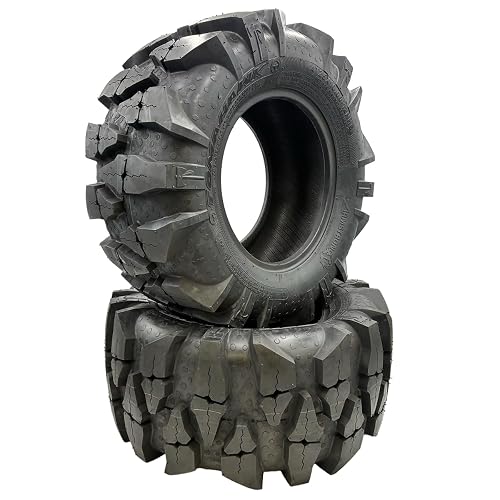
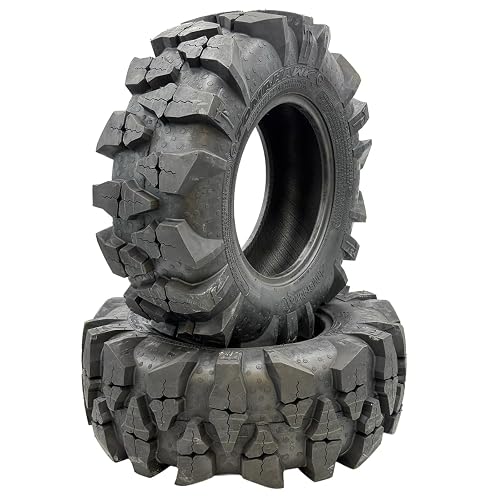
26×10 12 ATV tires are 26 inches in overall diameter, 10 inches wide, and designed to mount on a 12-inch rim. This guide walks you through reading that size code, confirming it fits your machine, choosing tread and load rating for how you ride, and checking the set once it is on. By the end you will know what to look for and what to avoid.
What the 26×10 12 Size Code Means
ATV tire sizes follow a consistent pattern: overall diameter, section width, and rim diameter, all in inches. In a 26×10 12 tire, the first number is the approximate overall height of the tire when mounted and inflated, the second is the tread width, and the last is the wheel diameter the bead seats on.
Shopping for one? See our guide: 7 Best Atv Quad Tires for Sale: Expert Picks for Every Trail.
Keep in mind that the 26-inch figure is nominal. Actual measured height varies by brand, tread design, and inflation pressure, so two tires with the same label can differ by a fraction of an inch. Use the label as a starting point, not a final measurement.
Reading the Sidewall
The sidewall will usually show a more detailed code, such as a load index, speed rating, and sometimes a ply rating. ATV tires often carry a ply rating like 6 or 8, which indicates strength rather than an actual number of plies. Higher ply ratings generally mean a stiffer, more puncture-resistant sidewall, which matters on rocky trails.
Step 1: Confirm Fitment on Your Machine
Do not assume a label matches your ATV. Check the factory tire size in your owner’s manual or on the sticker near the rack or under the seat. Many machines use different sizes front and rear, and some accept a range of sizes with different wheel offsets.
- Find the factory front and rear tire sizes in the owner’s manual.
- Measure your current wheel diameter. A 12-inch rim should measure 12 inches from bead seat to bead seat across the diameter.
- Check that the rim width matches the tire’s recommended rim range, which is printed on many tire sidewalls or listed by the manufacturer.
- Confirm that the overall height will not rub the fender, frame, or A-arms at full steering lock and full suspension travel.
Rubbing at full lock is a common problem with taller tires. If you are moving up in height, check clearance carefully and consider a lift kit only if the manufacturer for your machine approves it.
Step 2: Choose the Right Tread for Your Terrain
Tread pattern does more to determine how an ATV performs than almost any other tire spec. A tire that excels in mud can feel noisy and vague on hardpack, and an aggressive trail tire can clog quickly in sand.
| Terrain | Tread Style to Look For | Trade-off |
|---|---|---|
| General trail and mixed use | Moderate lug spacing, medium depth | Good all-around grip, moderate mud performance |
| Deep mud | Widely spaced, deep lugs | Louder on pavement, less precise on hardpack |
| Sand and dunes | Paddle-style or swept lugs | Poor grip on rocks and roots |
| Rocky and rough trail | Reinforced sidewalls, tight shoulder blocks | Heavier, can feel harsh |
| Utility and farm | Durable compounds, sturdy lugs | May sacrifice some traction in soft ground |
If you ride mixed terrain, a moderate trail tread is the safest default. If you know you will spend most of your time in one environment, choose the tread that fits that environment.
Checking Load and Ply Rating
Load matters more than many riders expect. A machine carrying a passenger, a winch, cargo racks, or aftermarket accessories puts more stress on each tire. Check the manufacturer’s listed load index against your machine’s weight and expected load. Choose a tire with enough margin rather than the bare minimum.
Step 3: Mount and Inflate Correctly
Once you have the right set, proper mounting and inflation protect both the tire and the rim. Use a bead breaker or a suitable tire tool, and avoid forcing the bead with sharp levers that can pinch the tube or damage the rim.
- Lubricate the bead with a soap-and-water solution, not petroleum products that can degrade rubber.
- Seat the bead evenly by inflating in short bursts, watching for both bead seats to snap into place.
- Set initial pressure within the range specified by the tire or machine manufacturer.
- Recheck pressure after the tire has settled and again after your first ride.
If you are unsure about mounting, have a qualified tire shop handle it. Improperly seated beads can fail under load.
Pressure Guidance
Pressure changes how the tire footprint behaves. Lower pressure widens the contact patch for better flotation and grip in soft ground, while higher pressure improves handling on hardpack and reduces the risk of the tire rolling off the rim. Manufacturers typically give a pressure range for each tire. Stay within it, and adjust gradually based on conditions. A low pressure tire gauge helps you read small changes accurately, which matters at the lower end of the range.
Step 4: Balance, Break In, and Inspect
After mounting, check that the tire seats evenly and has no visible bulges, sidewall cracks, or lumps. During the first few rides, ride more conservatively so the tire can settle and the tread can scrub in. Recheck lug nuts after the first ride, since new tires can shift slightly.
Maintenance is simple but important. Inspect for cuts, embedded debris, and uneven wear every time you clean the machine. Rotate tires if the manufacturer recommends it, and replace tires once tread depth becomes too shallow for the terrain you ride.
Common Mistakes to Avoid
- Buying by label alone. Always confirm the factory size and clearance on your specific machine.
- Ignoring load rating. Riders who add winches or carry heavy loads often outgrow stock ratings.
- Running the wrong pressure for conditions. Very low pressure on hardpack can cause sidewall damage or bead separation; very high pressure in sand reduces flotation.
- Mixing tire types front to rear without checking. Mismatched treads can change handling and should be a deliberate choice.
- Forcing a bead with improper tools. This is the most common cause of damaged rims and tubes during mounting.
Tips for Longer Tire Life
- Check pressure cold, before riding, for consistent readings.
- Avoid sustained spinning in one spot, which heats and wears the lugs quickly.
- Store the machine out of direct sunlight when possible, since UV exposure can dry out rubber.
- Clean mud and debris after rides to spot cuts and stones early.
Recommended Gear
A few tools make setup and maintenance easier and safer. Pick up a quality gauge, a bead breaker, and a portable inflator, and you will handle most tire tasks at home or on the trail.
- Low pressure tire gauge: Reads small PSI changes accurately, useful for fine-tuning pressure for sand or hardpack. View on Amazon
- Bead breaker tool: Helps seat and separate beads without damaging the rim or tire. View on Amazon
- Portable tire inflator: Lets you adjust pressure on the trail or at camp after changing terrain. View on Amazon
FAQ
Do 26×10 12 tires fit every ATV?
No. They fit machines that use a 12-inch wheel and accept that overall height. Always confirm against your owner’s manual and check clearance at full steering and suspension travel.
What does the 10 mean in 26×10 12?
The 10 is the approximate section width of the tire in inches. It affects footprint, flotation, and how the tire fits the rim.
Is a higher ply rating always better?
Not always. Higher ply ratings usually mean stronger sidewalls, which help on rocks but can ride harsher. Choose based on your terrain and how you ride.
What tire pressure should I run?
Start within the range the tire manufacturer specifies. Lower pressure generally helps in sand and mud, while higher pressure suits hardpack. Adjust in small steps and recheck. For a deeper explanation, see our tire pressure guide.
Can I mix tread types front and rear?
You can, but it changes handling. Many riders run more aggressive tread on the rear for traction and a milder pattern up front for steering. Test changes carefully on familiar ground.
How do I know when to replace my tires?
Replace tires when tread is too shallow for your terrain, when sidewalls show cracks or bulges, or when punctures and cuts become frequent or cannot be repaired safely.
Should I have a shop mount my tires?
If you lack the proper tools or experience, yes. Improper mounting can damage the bead or rim and create a safety risk. Consult a qualified tire professional for this work.
Do I need to balance 26×10 12 tires?
Balancing helps reduce vibration at speed, particularly on hardpack and pavement. Many riders balance during mounting or when the tire shows uneven wear.
Conclusion
26×10 12 ATV tires offer a solid balance of height and width for many trail and utility machines, but the right set depends on your exact fitment, terrain, and load. Confirm the factory size, choose tread and ply rating to match how you ride, and mount and inflate carefully. A few good tools and regular inspections will keep your tires performing and your riding safer.
Related reading
- Where Are SunF ATV Tires Made? Origin, Factories and How to Check
- Tire Pressure for ATV Tires: Review and Buying Guide (2026)
- Stock Honda ATV Tires: Sizes, Types and How to Choose the Right Set
- Snow Chains for ATV Tires: 6 Best Picks for Winter Trail Riding (2026)
Ready to choose one?
About Graham Fisher
Graham Fisher is part of our editorial team and reviews and edits our ATV, UTV/side-by-side & dirt bikes guides, checking product details against manufacturer specifications and owner feedback.